Table of Contents
Last Updated on January 25, 2023 by Heenan
Sealing the pavers can be of great use when you move to a new place as it can withstand the heavy-duty traffic of foot and cars. Driveways and walkways are the best pavers to seal as they are used very often.
Many people who have sealed their pavers have expressed great satisfaction with it. You can do it on your own or hire someone to do it for you, but believe me; you will be shocked by the results this small change can make.
Now, you might think about how to apply paver sealer. Do not worry; follow the guide as we will teach you the process step-by-step.
How to Apply Paver Sealer: Step-by-Step Guide
To make the process very easy, I have made this guide which you can follow and get your pavers sealed in no time. Before starting, get the supplies to avoid running to the store. You will need- a metal sprayer and nap roller/ rollers, sealant, polymeric sand, leaf blower, and pressure washer if required.
Step 1: Cleaning
It is essential to ensure that you have a clean seal paver. To do this, you can use a leaf blower and get rid of the dirt, dust, and sand. If there is some tough grime or stains, use a pressure washer to get rid of it.
Step 2: Drying
After the cleaning process, drying the paver is equally essential. Leave the paver to dry for at least two days and avoid foot or wheeled traffic.
Step 3: Leveling
Check if there are any twists or crooked pavers, or broken sides, and fix them by filling the gap with polymeric sand. This will ensure an even paver without any dislodgement.
Step 4: Choosing the Sealant
Choosing a sealant is very important, and it is based on the type of material you are using, the layout of the paver, and the desired finish.
There are two types of sealant: a water-based sealant, which is more robust and gives a shiny finish, and an acrylic sealant, giving a glossy finish. Pick one based on the desired finish.
If your paver has a tight layout, use a water-based sealant, and they are more penetrating as well. For a paver that is not laid tightly, use an acrylic sealant.
Step 5: Sealing
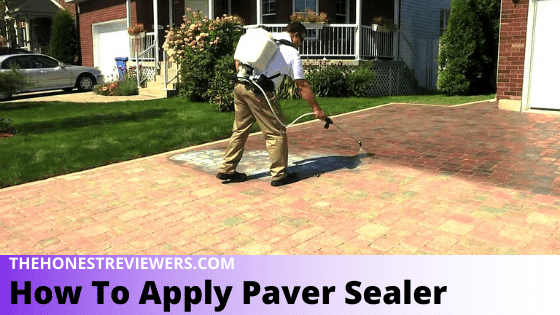
For sealing, you can use a metal sprayer to spray over a small area in a circular motion for even distribution. Then use a nap roller using back rolling, and spread the sealant more evenly. This will also get rid of pockets and excess sealant.
Or you can use a roller and spread the sealant first, rolling in a north-south motion and letting it dry before applying the sealant again in an east-west motion.
Keep sealing until you are done covering the whole paver with sealant. And move to the final step.
Step 6: Final Drying
Now that your paver is sealed let it dry for a day or two until it is completely dried. Avoid stepping or wheeling on the paver until dry, or it will leave patches.
The final result will be a shiny paver, ready for use. However, you must keep repeating the process every two years for further longevity.
Tips
- Try sealing in warm weather as it helps in drying easily
- Use a paintbrush for tight areas to get the sealant in those spots
- Cover edges close to the paver with a board when sealing
- Choose the proper sealant for your paver
Final Words
After sealing, you will not be able to return to the old, dusty paver that once existed. It is very easy and inexpensive. For sure, this will add to the beauty of a house.
As you know how to apply paver sealer, give it a try. Follow the simple steps, and you’ll be ok.
Related Resources:
#1. High-quality Brick Sealers.
#2. Most Favorite Stamped Concrete Sealers.
#3. Most Favorite Paver Sealers for a Wet Look.
#4. Most Favorite Paver Sealers For Natural Look.
#5. Most Favorite Concrete Paver Sealers.
#6. Most Favorite Water-Based Paver Sealers.
#7. Step-by-step Guide to applying Driveway Sealer.
#8. A Step-by-step Guide to Sealing Concrete Driveway.
#9. Concrete Driveway Sealers Buying Guide with FAQs.

