Table of Contents
Last Updated on November 25, 2024 by Heenan
There are several ways to stain a concrete patio to look like natural stone. You can always apply a resurface overlay coating directly to the concrete surface followed by staining the concrete floor.
Steps are not that hard to complete however getting the best results strikes multiple steps and this takes a hell lot of time.
Good for you!
In this post, I will explain how I transformed a concrete patio to appear like a real stone through a step-by-step process.
By the end of this tutorial, I will be answering some of the most frequently asked questions concerning the aesthetics of changing the look of the concrete by applying various concrete stains.
Let us begin with the steps to give the concrete project a stone appearance.
How to Stain Concrete Patio to Look Like Stone – Step-by-Step
Assuming you coated the surface with epoxy paint previously? I will attend the proceeding and take off the previous painting. This is the most commonly followed step of a resurfacing project; I list it here. If you went with only painting or coating earlier, just go to step 1 and step 2.
Step 1: Removing the Previous Coating
Grind off the surface to remove any previous coating, such as epoxy paint. It will create the surface that is best suited for the adhesive the overlay material you will put on.
This Dewalt concrete grinder is what I recommend for the best results. It works just fine, and you can insert a vacuum hose to reduce the dust on the tabletop.
That grinding can be sufficient to remove all that prior epoxies.
Let me know what is the next step.
Step 2: Clean the Surface
While most of the dust got sucked into the vacuum hose of the grinder, there will be some extra dust on the surface and you will have to clean them.
Clean things up with a pressure washer and a higher-degree nozzle (40-degree or 65-degree) or the garden hose.
No need to sand the surface dry to move onto the next step. If it’s a little wet, that will help keep the overlay material from drying out.”
Step 3: Apply Tape
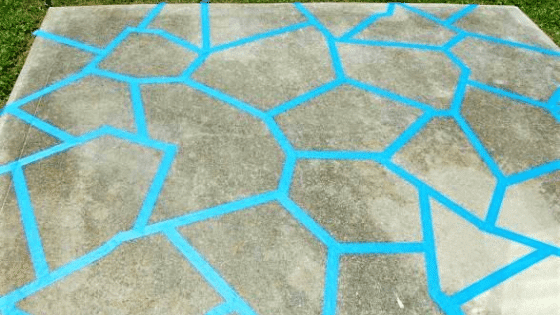
Apply tape to the region where it should not touch the overlay material. Generally, you will not wish to apply this tape on the edges. Any quality duct tape will do for this step.
Step 4: Prepare the Resurfacer
Time to mix the resurfacer; a quality mixed, fast mixer is advisable. It needs to be resurfaced to work like you want it to and I would suggest using a product from Quikrete to do that.
Edward Tools paint and mud mixer for drill and VonHaus 10amp drill with spade handle – When I bought a drill to mix, I recommended this straight out of the box.
Use the instruction manual to prepare an exact blend.
Step 5: Applying the Overlay Material and Let it Dry
Make sure the surface is wet before you apply the overlay material. Otherwise, give it some water, to wet it up proprely. Adding some will prevent the overlay material from drying out.
Next, it’s time to pour the material onto the surface screen.
Let us not complicate things here. Just pour the material down, and use a good squeegee to make sure the material is distributed evenly across the entire surface.
Let this overlay material coat dry, while you render the surface surface.
Once the whole surface appears lighter than when you stopped applying the material, it can be considered dried.
Step 6: Making the Texture
Now, I will teach you how to create a trowel-down texture on the surface.
To create the trowel-down texture, you have to use the same overlay material you used when you put on the first coat (see step 5). However this time, it will be slightly thicker than the previous time so that the texturing will be a bit easier.
The texture is best accomplished by hand whipping it. It requires careful doing so that, in this case, you won’t make too thick of an area or too thin of an area.
YOUR TEXTURE AND MOVEMENT Create your desired texture and move to the next step.
Step 7: Cutting the Kerf / Scoring
Outline a natural stone pattern across the surface to enable smooth and precise scoring.
To make the cut or score, use this DEWALT angle grinder outfitted with a diamond blade. Here you have the overlay material being cut to the stone pattern that you have just chalked out.
Step 8: Prep the Surface for Staining
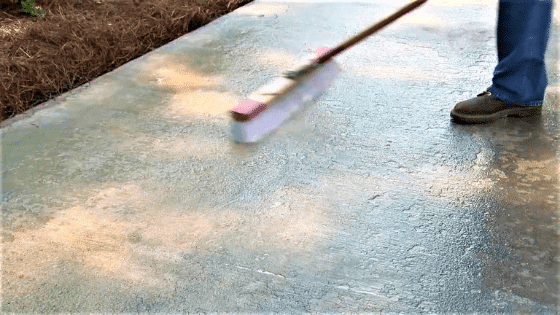
At this stage, very likely, the surface isn’t too messy. However, you still want to go grem up all the existing dust and leaves (if any) with a push broom or leaf blower.
Skip the water at this stage. Dry clean the surface.
Step 9: Applying the Concrete Stain
Just mixing up concrete stain is another easy-as-pie job since the stain that I’ll recommend needs only water to mix with. First, you want a simple sprayer to apply the stain on the surface.
So, I recommend this affordable concrete stain by Concrete Resurrection. It comes in so many different stains and a variety of sizes. Now you can choose whether you want your wood to be darker or lighter — this stain will cover all of it.
Mix the stain with water, then immediately begin spraying the full surface.
Light coat forthe first coat. For coat 2, give it a hard coat and accent some of the segments by making them more notable from the other stones. It will make its surface resemble more closely that of a stone.
For the third, you could coat a different color of the same stain to add some color variation, or also just to skip the third coat altogether.
Let the stain dry properly. Next, do the following without carrying any delay.
Step 10: Applying the Sealer
Begin sealing the surface now. Keeping the seal will make sure that it will flourish in even the most foolish of weatherizations. In addition, it enhances the stain colour more than ever.
I have also written an article on how to seal concrete. If you are not sure what sealer you should buy to achieve the best outcome, then here is my review of several first-rate concrete pavers sealers.
But that sealer isn’t going to last forever. Sealers should be applied every two to three years on stained surfaces, according to experts.
This is how you can stain a concrete patio to resemble stone.
Concrete Stain Concentrate Review
Pros
- Available in several colours and sizes
- Easy to mix and apply.
- Quick-drying time.
- No strong odor.
- Great customer service.
- Bargain price.
Cons
- Not too dark.
This stain is made by Concrete Resurrection and comes in several colors.
Using this stain is a breeze. The stain needs to be mixed with water — but any pump sprayer can be used.
It’s reasonably priced, too.
Frequently Asked Questions (FAQs)
#1. How do you paint a concrete patio to look like a stone?
Answer: First, dry clean the patio then tape off the area which you do not want the paint to touch.
What changes simply (lit) tape works all through like a stone shading
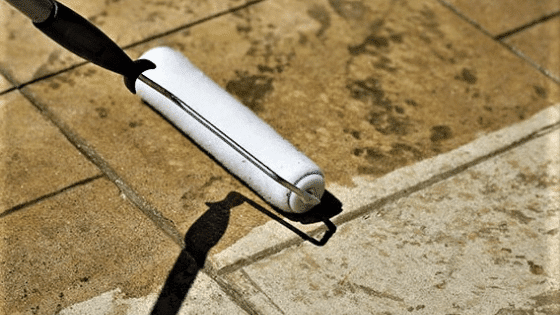
Vidlies The use of stone color paint is of good quality. Between the freshly sectioned segments, apply two coats of paint with a nap roller or paintbrush.
Allow sufficient drying time between coats for the surface.
#2. How do you stain outdoor concrete?
Answer: Surface prep is key above everything else. Scrub the area on which the mildew, dirt, oil stain, etc. are present and remove it. If there are any stubborn grease marks, use a degreaser.
Wearing safety goggles, respirators, boots, gloves, etc, wash the area with acid.
Allow the outside area to dry for at least 48 hours, and then use a brush or roller to apply a coat of stain to the surface. If a second coat is needed, give it at least 24 hours to dry.
#3. How do you stain concrete to look like marble?
Answer: What is the best way to get a marble look on concrete? As with any other concrete staining procedure, the first thing you’re going to want to do is prep the surface. Mix concrete cleaner and degreaser, scrubbing the surface, and then mop or vacuum the surface dry.
Finally, apply the acid stain with a pump-up sprayer or bucket pour.
Now you are ready to apply the stain, but be sure to seal the surface when you are finished.
#4. How do you stain concrete to look like a slate?
Answer: A simulated slate presentation along a concrete surface is done similarly to the steps involved in giving different presentations like those of marble.
You have to clean the surface from dust, leaves, oil marks etc.
Then stain then seal the top.
Final Words
After reading the steps, they are clear enough at this step about how to stain the concrete patio to resemble natural stone.
This entire process is known as resurfacing a concrete patio. Here, you place a thin layer of concrete as a layer on the existing surface, make a trowel-down texture to reproduce the stone’s look and then apply concrete stain to reproduce the stone’s color. Lastly, you seal the entire piece so it lasts.
I hope this article contributed something valuable to your decorative concrete knowledge.
Now it’s your turn!
Do as follows and dress the patio differently.
Related Reading:
Concrete Driveway Sealer Buyer’s Guide.

